
Here is the tutorial on Ford F-150 ECU module programming guide using vxdiag vcx nano Ford and FDRS software program.
FDRS is the official dealer diagnostic and repair software used by technicians at your dealership. It can test (run diagnostics) on various modules, update module software, load/reload as-built configurations etc.
Check: Ford and Lincoln vehicles by model year supported on FDRS.
The VCX Nano works perfectly with ForScan as a J2534 pass-through device. In fact, its much faster than their official ELM327 interface. ForScan is mostly used for module configuration, it cannot do module SW update (yet). Check: VXDIAG VCX NANO Ford and ForScan
You can use it to make quite a few changes on Ford truck (including the Glarefree lightning which involved updating multiple modules on the truck).
Credit to iceman77. The tutorial here is for educational purpose. You are at your risk.
Tools you will need:
– Windows PC with 4GB RAM or greater, running Windows 10 natively (Macs running Windows bootcamp or other VM based solutions are known to cause issues)
– VXDIAG VCX Nano for Ford/Mazda interface
– USB Flash drive 64GB or larger (must be formatted to exFAT)
– 12V Automotive Battery Charger/Maintainer (can be purchased from Amazon)
Software you will need:
– VX Manager (installs driver for your VXDIAG VCX Nano device)
– Ford Diagnostic & Repair Software (commonly known as FDRS)
Software installation (step-by-step):
1) Download the latest VX Manager installer from here
2) Start VX Manager installation, when prompted select PASSTHROUGH – J2534
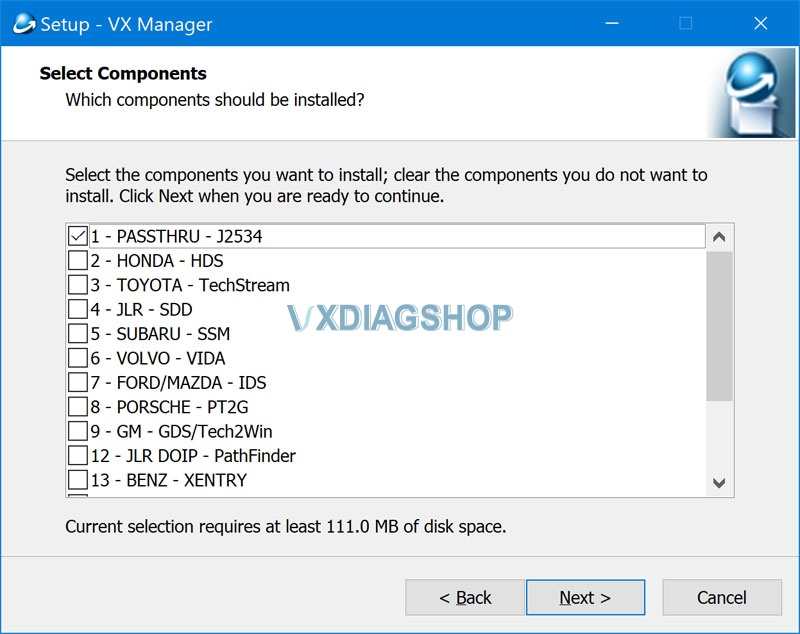
DO NOT SELECT FORD/MAZDA – IDS. Using this IDS emulation can brick your ECU during the update process (learned the hard way)
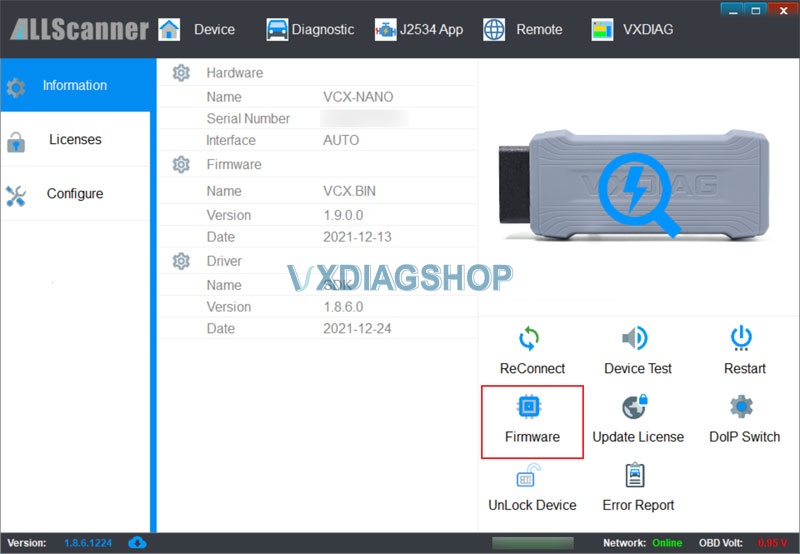
3) Connect VCX Nano Ford device to your PC using the supplied USB cable and launch VX Manager. The tool should recognize the device. If there is a device firmware available, update the device firmware
4) Download and install FDRS software from here. You will need a license to run this software and can be purchased here (2-day FDRS license cost $50)
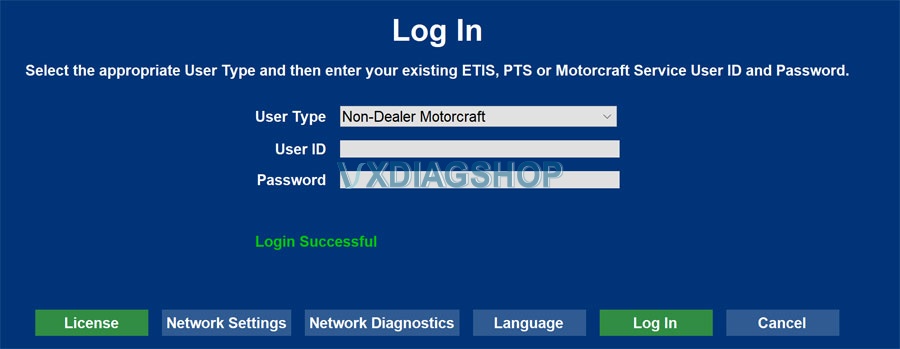
5) Launch FDRS, you will be prompted to enter the license that you have just purchased. Login using your credentials created on Motorcraft website. Make sure you select Non-Dealer Motorcraft as User Type
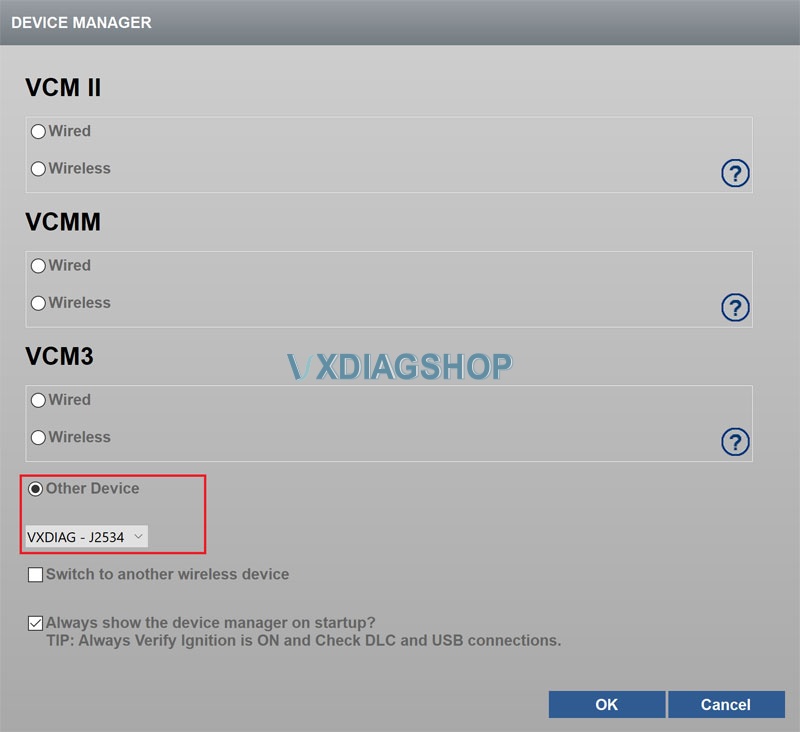
6) Connect your VXC Nano Scanner to your truck’s ODBII port and connect the USB cable to the PC running FDRS. Once FDRS Device Manager pops up, make sure you select Other Device, in the drop-down dialog select VXDIAG – J2534.
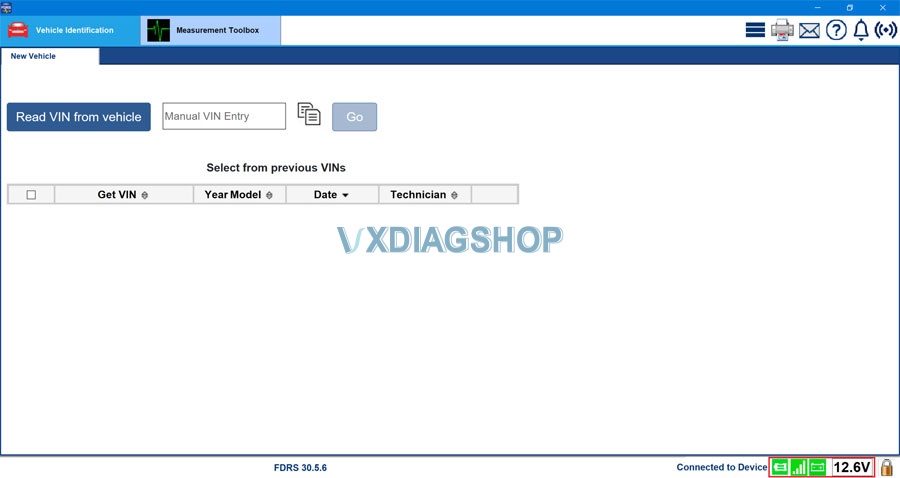
After this you should be greeted with this screen, meaning you are ready to go!
The icons at the bottom should be all green with battery voltage shown
Running Network Test (Intial Scan)
1) Turn Ignition On, Engine Off
2) Click Read VIN from vehicle
3) Click Go to initiate Network Scan
Once completed a new tab called Toolbox will appear at the top of your FDRS screen:
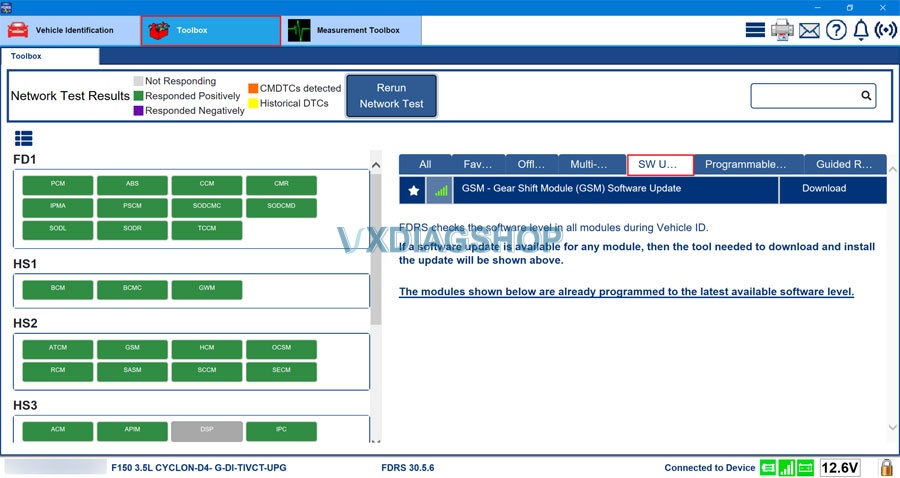
On the left hand side you will see all modules detected on your truck. The ones that responded positively will be marked green. On the right hand side notice the SW Updates tab. Head over here to see all available SW updates for your modules. This is a 2021 Ford F-150 Platinum.
Module SW Update Procedure
1) Head over to SW Updates tab in the FDRS Toolbox window.
2) If there are updates available, hit the Download button. The tool will download the necessary tools needed for the module update.
3) Once download completes the button turns green with a text “Run”.
4) Run the SW Update procedure and follow the on-screen prompts very carefully
IMPORTANT: Make sure you have a solid battery charger/maintainer connected to your truck during the SW update procedure. Last thing you want is the battery die on you while flashing your modules. Do not proceed unless you have solid 12.5V or more showing on your ODBII port.
Be patient, some modules take long time to update. This is especially true for IPMA module which takes almost 3 hours to complete. Therefore, it is very important to have your truck connected to external power supply (battery charger/maintainer)
DISCLAIMER: The customer have updated many modules with this setup without any issues and zero failures. That does not mean a failure cannot happen. Flashing ECU modules is a dangerous operation. Do this at your own risk! We will take no responsibility for any damage to your vehicle by following the above described procedure.
NOTICE FOR FORSCAN USERS: FDRS will knock out your recent FORScan changes from your modules you are updating. It reloads your As-Built (AB) data at the end of the SW update procedure. Make sure you back-up your FORScan changes and load them back after you are done with SW updates. By time your FORScan changes get propagated to your AB data set on FORD servers, so this would not be an issue. This would only affect users performing FORScan changes and running module SW udate within short period of time.
USB Update Procedure:
Certain modules need to be updated via USB flash drive. This is especially true for GWM, APIM and TCU update. FDRS tool will prompt you to insert a blank USB flash drive into your PC. Make sure the drive is formatted to exFAT. The tool will copy all necessary files onto the flash drive, once done, you will be prompted to insert it into your truck’s USB hub under the HVAC controls. Follow the on-screen instructions carefully. It may take a while for the update process to show up on your SYNC screen, so be patient. FDRS will instruct you to have your engine on, while the your truck copies the update files from flash drive. I found this not necessary if your truck is connected to an external power source (battery charger/maintainer). Once done, you will see a Restart Required prompt on your SYNC screen. At this point turn ignition OFF and open the driver door. DO NOT REMOVE THE FLASH DRIVE. Wait at least 10 minutes, close the driver door and turn ignition ON. You should shortly get a message Update Successful and you can remove the USB flash drive at this point. Follow the instructions in FDRS to finish the update process.
APPENDIX I:
Certain updates (such as PowerUp 2.3.0 OTA equivalent) would require to wait up to 30 minutes before powering the truck back on after Restart Required message is shown on SYNC screen
APPENDIX II:
If you updated the DDM/PDM modules, you need to run the ‘Power Door Window Initialization’ for both modules. This can be found in each of the module task window (on the right hand side) in FDRS. This is needed for your windows auto open/close to work
APPENDIX III:
Your truck may exhibit a Reverse Brake Assist Unavailable message after module programming
has been completed. This may be due to a network interruption from programming or configuring modules, which can cause steering center find to be reset. When the steering center find is reset, this causes various features to become disabled. The steering center find can be relearned by driving the vehicle approximately 5 minutes above 18 mph (30 km/h) straight ahead on a flat surface with no steering inputs for a few seconds. When Steering center is found the Reverse Brake Assist Unavailable message will go away.
APPENDING IV:
There seems to be a bug in the FDRS software when J2534 pass-through interface is used, where module status report gets corrupted and erroneously reported to Ford cloud during the “Network Scan”. Until this is fixed, “Network Scan” functionality in the FDRS tool should be avoided.
If your truck is already affected by this bug (you will notice loss of Horn & Lights, SecuriAlert and OTA in your FordPass), you need to fix it.
IMPORTANT
There seems to be a bug in the FDRS software when J2534 pass-through interface is used, where module status report gets corrupted and erroneously reported to Ford cloud during the “Network Scan”. Until this is fixed, “Network Scan” functionality in the FDRS tool should be avoided. If you happen to lose certain “connected” functionalities (such as Horn & Light, SecuriAlert and OTA) after playing around with FDRS, here is how you fix it:
1. Connect your VXDIAG VCX Nano Ford to your computer and your truck.
2. Open FDRS, and run a Network Scan.
Once done, make sure your GWM module is showing a valid Software P/N (the field should not contain any spaces or special characters). Should be ML3T-14H021-XXX. See example below:
This usually fixes the SecuriAlert and Horn & Lights issue. If not, restart FDRS (this step is important) and run another network scan. Repeat this until the GWM Software P/N is shown in proper format!
Some background on the Network Scan importance:
Network Scan is deemed important (as per Ford), as it reports the current state of module configuration to your As-Built dataset on Ford servers. These data are needed to reload configuration to the module after module SW update or PMI (Programmable Module Installation) function is executed. Note though, your truck performs and reports its own “Network Scan” periodically. However, it might happen that your configuration is not up to date, especially if there is a gap between the latest “self-report” and your module update. This can be easily mitigated by saving the module configuration via ForScan and reloading it after module SW update is completed. The module configuration does not change much, and I had to personally do this only once, when my FDRS based APIM update knocked out all of my ForScan changes.
