


Tech2Win is the Diagnostic Software for 1991-2013 GM vehicles including passenger cars, light and medium duty trucks and saturn vehicles. It is the Windows PC version of the Tech2 handheld diagnostic tool.
Requirements:
-
Diagnostic Interface:
-
Software: Tech2Win
-
Operating System: Windows XP 7 8 10 (32/64-bit)
IMPORTANT INFO:
-
Tech2Win will NOT work with a Windows Virtual Machine. It must be installed on a Windows PC
-
This setup guide is designed specifically for our diagnostic interface and software. It may not work with hardware/ software purchased from another vendor.
-
SPS [Service Programming System] requires an online subscription. Only offline diagnostics is supported.
Setup Tech2win on Windows 10 step-by-step:
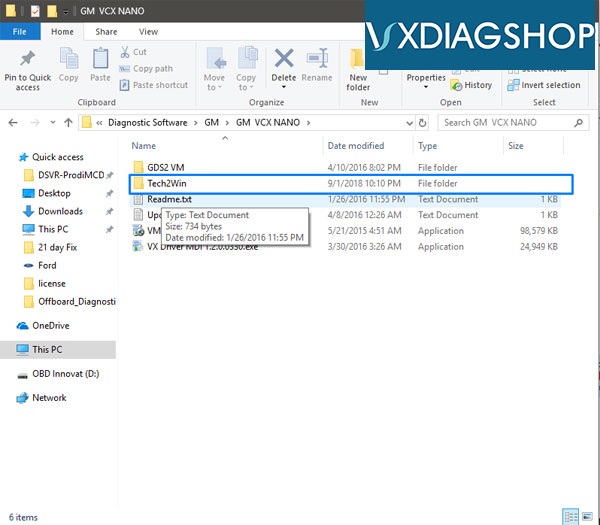
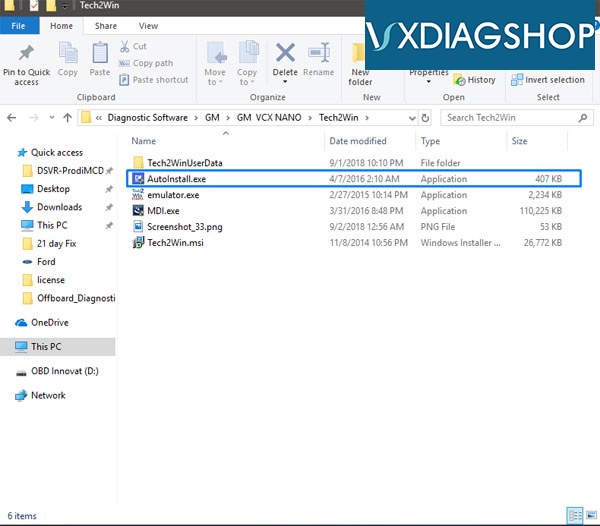
1. Insert Disc or open the downloaded software folder. Then open the [Tech2Win] folder and open the [AutoInstall.exe] to install the software.

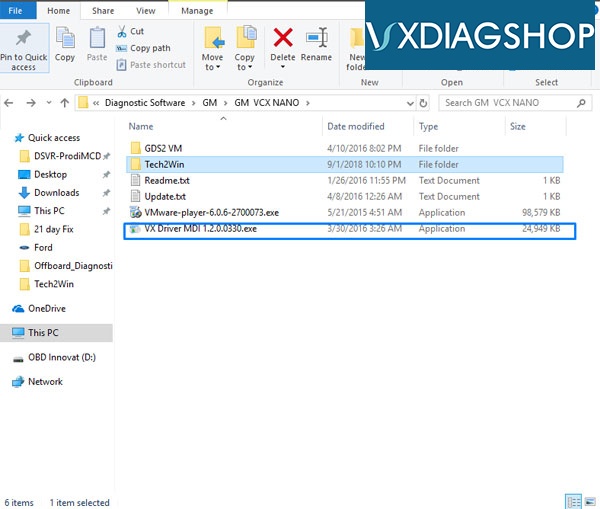
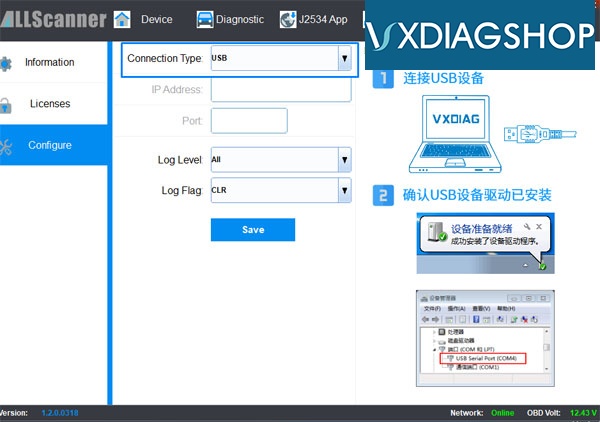
2. Install the [VX Driver MDI 1.2.0.0330.exe]. After the installation is complete, go to the Windows Start menu and find the [VX Driver MDI] folder and application and open it.
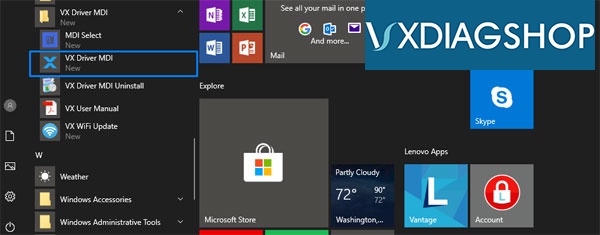
3. The VX Driver MDI software allows you to manage the interfaces currently connected to the PC. This is where you can verify if your hardware is connected, working properly, set which type of connection type you want [USB, WiFi, Bluetooth, etc] and more.

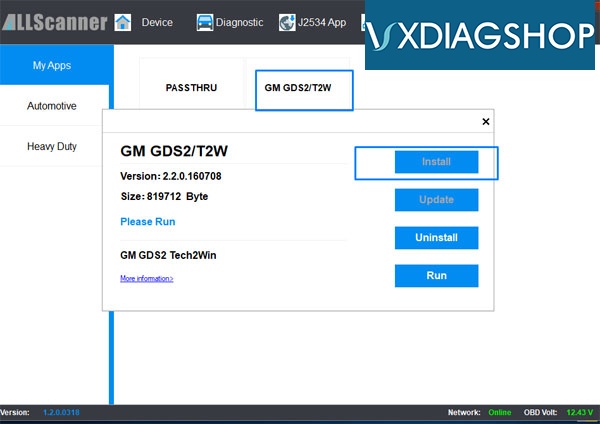
4. Go to the [Diagnostic] tab on the top and go to [My Apps] then [GM GDS2/T2W]. Then click on [Install].
5. Go to the Desktop and start the Tech2Win software from the desktop shortcut icon.

6. Right when the software starts, the Tech2Win-Configurator will pop up and ask you to choose which configuration you’d like. This would be based on your region or type of vehicle you’re diagnosing. In our example, we choose [North America]. Based on your region, there will be different models available from the vehicle selection menu.
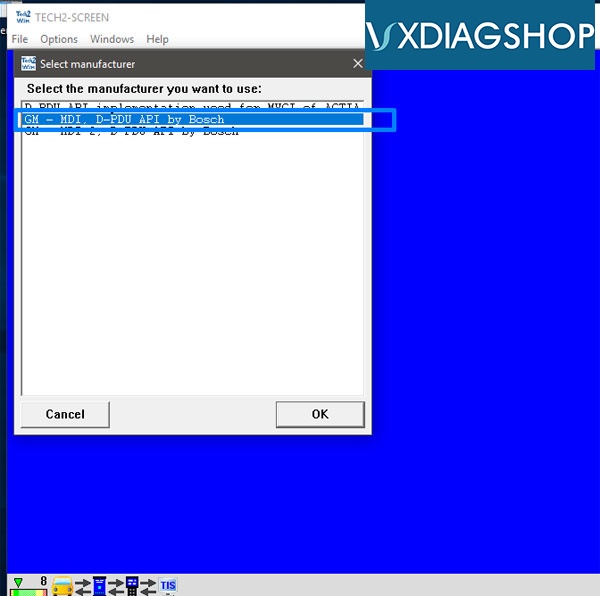
A box will pop up asking you to select the manufacturer or interface you’d like to use. The interfaces available will vary based on other types of diagnostic software you may have installed.
Select [GM – MDI, D-PDU API ny Bosch]
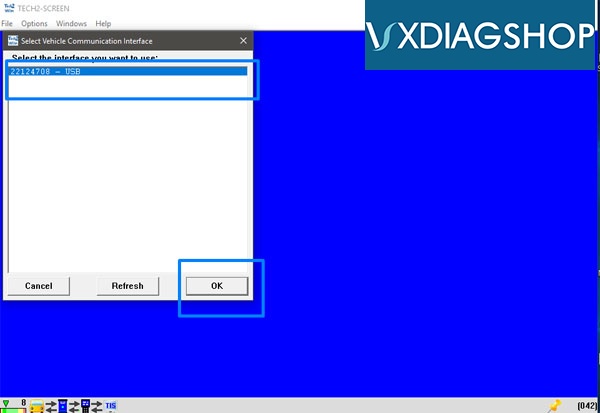
Then Select the interface [22124708 – USB] and click [OK]
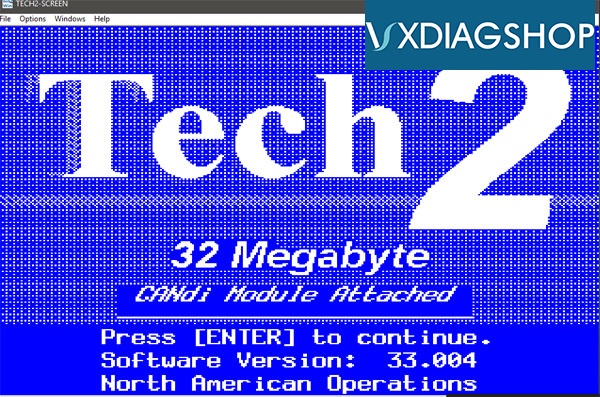
The software will start to load and then show you the main menu. Press [Enter] to continue.
7. Now the main VXDIAG GM Tech2Win menu will load. Press [Enter] to continue to main menu.
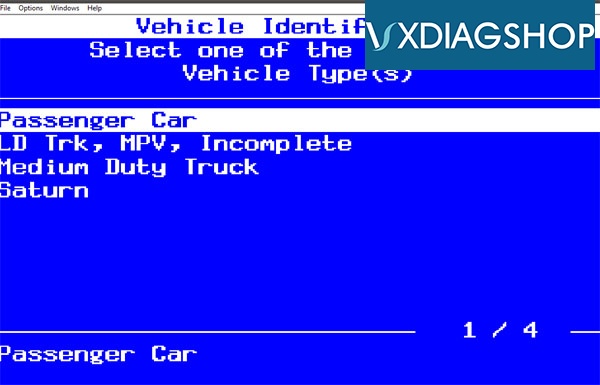
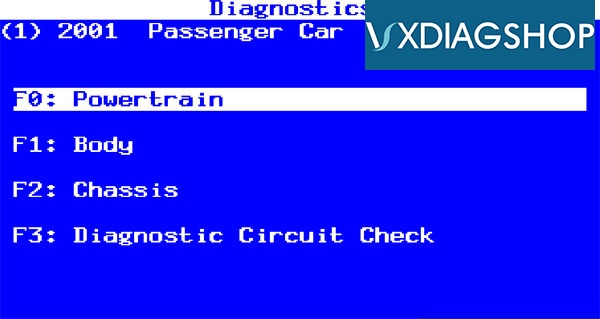
The next set of screenshots will show us going through the Diagnostic menu, selecting the
-
Model year
-
Vehicle Type
-
Powertrain, Body, Chassis
-
Engine Type
-
Transmission
-
Function you would like to perform
Some of the functions available include:
Diagnostic Trouble Codes [DTC]: Read and Clearing Diagnostic Trouble Codes
Data Display: Read real-time engine data, EVAP data, fuel trim data, misfire data, etc
Special Functions:
-
Engine Output Controls
-
Fuel System
-
IAC System
-
Crankshaft Position Variation Learn
-
Misfire Graphic
-
Service bay tests


http://www.vxdiagshop.com/service/how-to-install-vxdiag-vcx-nano-gm-tech2win-on-windows-10-6027.html
Related post:
How to Install VXDIAG GM GDS2 without VMware
VXDIAG VCX NANO GM Tech2WIN Windows 10 Review