
Here’s the step-by-step guide to setup VXDIAG VCX NANO Ford IDS software on virtual machine.
Current version: Ford IDS V110 (till December 2018)
.
Computer Requirements
Processor: Core CPU 2GHz+.
Memory: 4G Bytes or more.
Hard disk: 40G or more.
Display: Resolution 1024×768 or higher.
Network interfaces: LAN 10 / 100M or 802.11b / g.
Communication Interface: USB2.0 or USB3.0
Operating System: Windows XP SP3 / Win7 / Win8 / Win8.1.
Use IDS in VMware
You can easily use Ford IDS or Mazda IDS with VMware.
Setup
Your explorer does not support the HTML5 Video.
Please Use Chorme / Firefox / IE9+
You can watch the Video with Media Player: (DVD\VCMII_Setup_html\VCMII_setup.mp4)
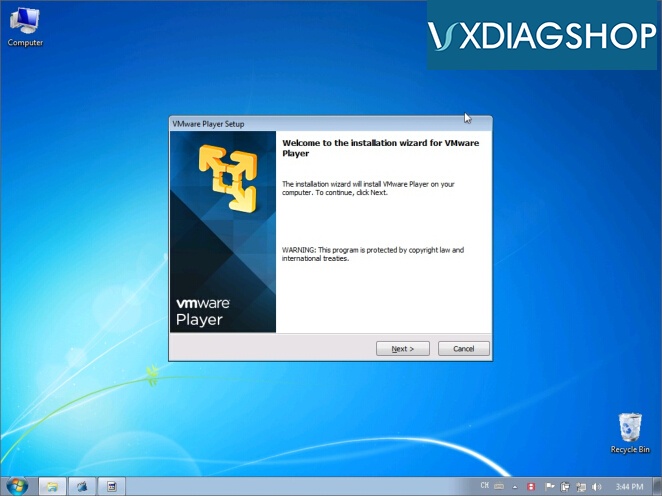
1. Open DVD and install VMware-Player-6.0.6.exe

2. Installing VMware Player
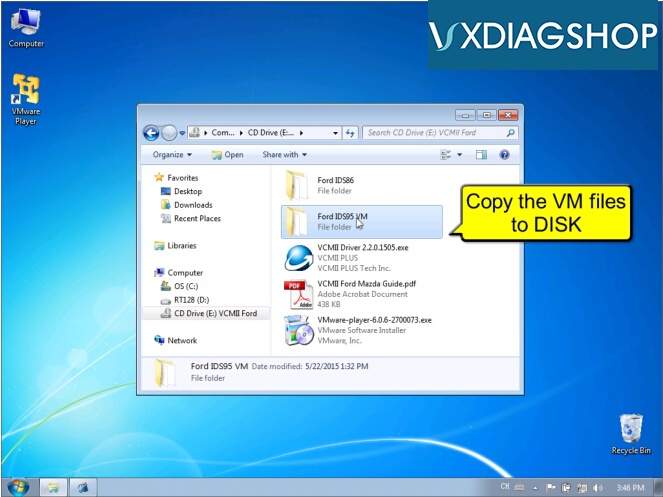
3. Copy VM Files to DISK
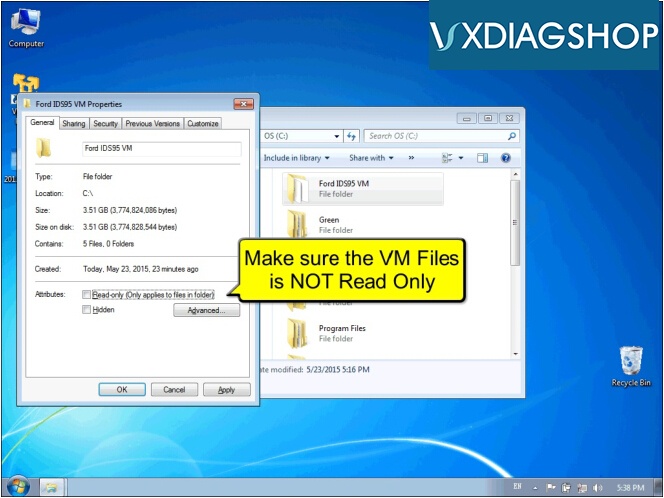
3. Make sure the VM Files is NOT Read Only
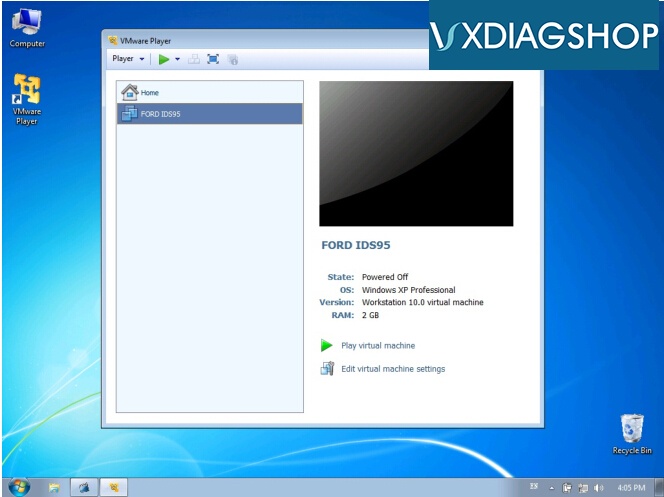
4. Open VMware Player and Open VM.vmx
5. Configure VM Memory and CPU Performance

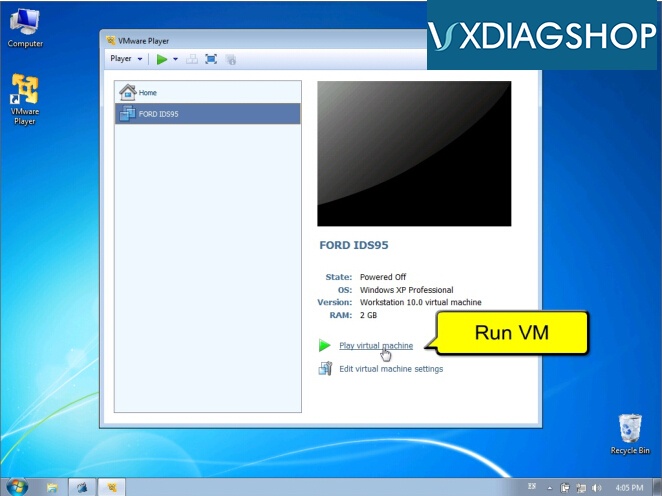
6. Run VM
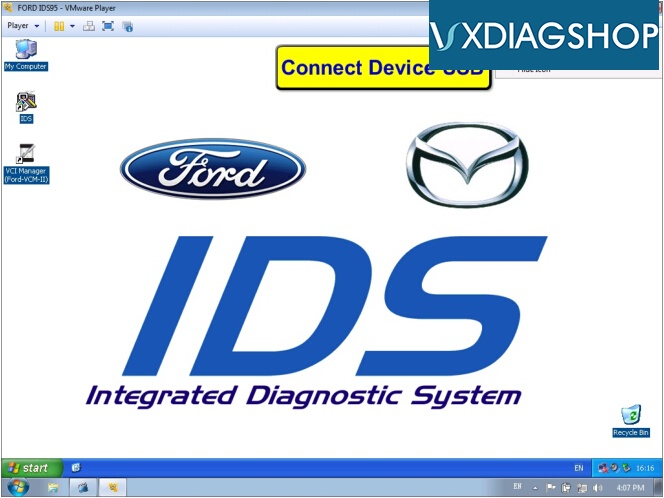
7. Connect VXDIAG Ford Device USB to VM
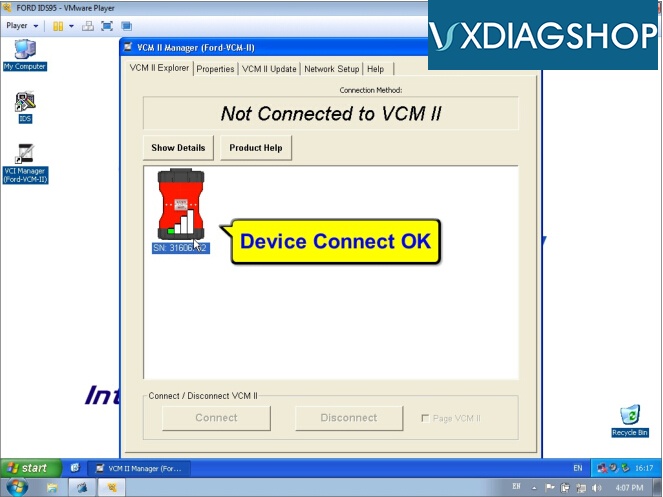
8. Open VCI Manager to check device
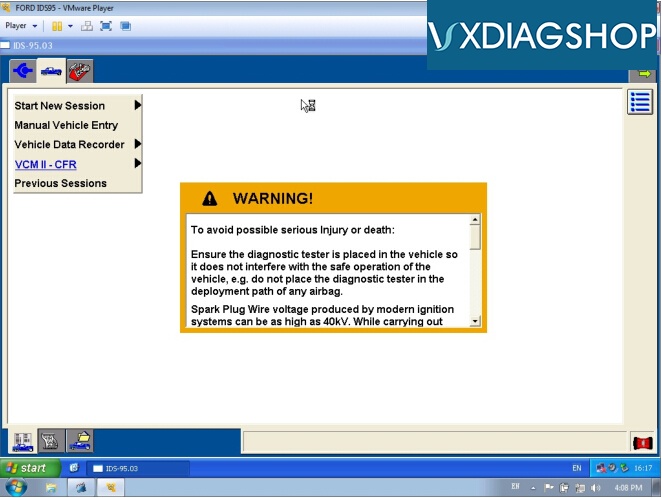
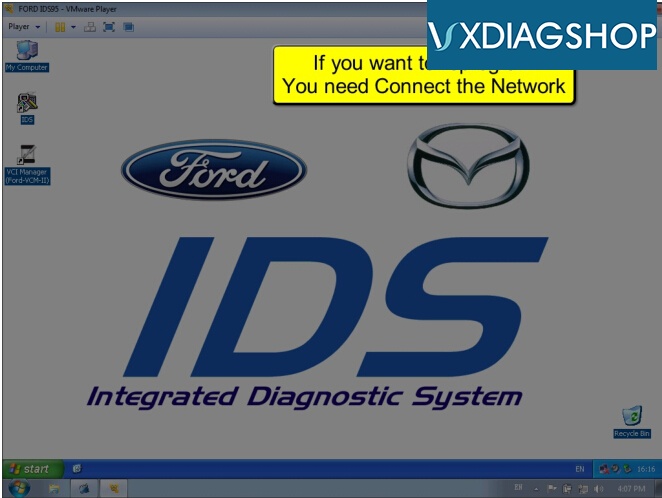
9. Open IDS software
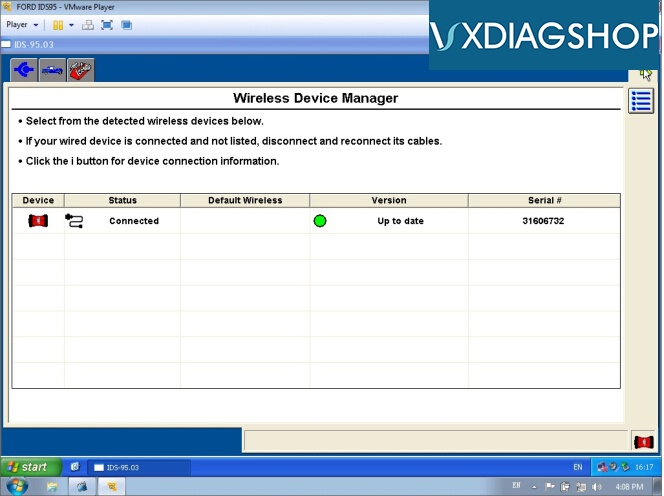
10. IDS Device Manager
11. Ford IDS Software Version

12. Diagnostic Vehicle Specification

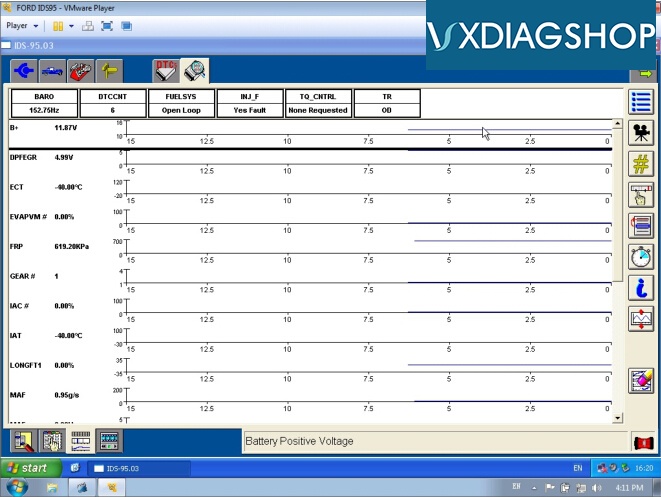
13. Diagnostic PCM DTC

14. Diagnostic PCM DataLogger
15. Connect to Network for Online ReProgram
Setup IDS and VXDIAG in your PC
If you need to install the IDS to the physical machine, just 2 steps:
Install IDS software.
Install VCMII-Driver-2.2.0.1505.exe from DVD.
Note: Ford IDS and Mazda IDS can not install in one PC.
http://www.vxdiagshop.com/service/how-to-setup-vxdiag-ford-ids-software-on-vmware-6026.html